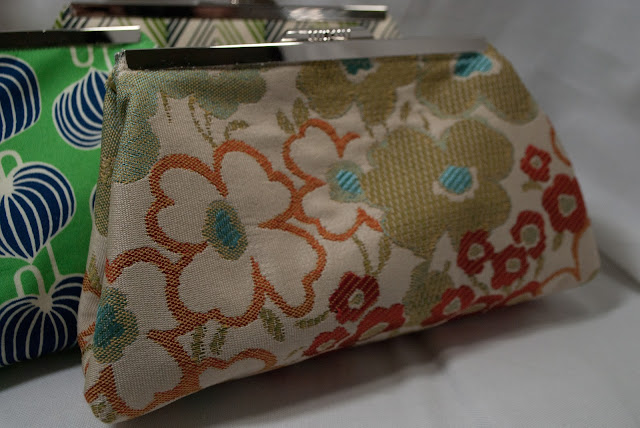
This clutch is easy-peasy, and so satisfying when complete, that I thought I would share the steps:
Materials:
-13"high by 13.5" wide square of main fabric (drapery/ lighter weight home interior fabric works well. Do not get too heavy of fabric, especially for your first go as it mighn't fit in the channel.
-same dimensions lining fabric
-same dimensions interfacing
-about a 10" wide by 13" strip of fusible fleece.
-one 6.5" glue-in metal frame (can be found abundantly on Etsy)
-industrial strength glue, I use Gutermann's glue
Part 1: Preparing the Fabric
1. Cut outer fabric square and fuse interfacing onto the wrong side. Center fusible fleece and fuse on wrong side on top of interfacing.
 |
| Cut Main Fabric |
 |
| Cut Lining |
 |
| Fuse Interfacing and Fusible Fleece on Wrong Side of Main Fabric |
Part 2: Sewing the Clutch
2. Sew RST main fabric to lining along the two top long (13.5") edges with .5" seam.
3. Trim the seam to 1/4" and turn RSO and press.
4. Sew along the seam to provide and nice flat, finished edge. I believe this serves 2 purposes: 1) some stability when placing the edge in the frame, and also give a nice finished edge for the parts that are not concealed by the frame.
5. Fold clutch in half and secure with binder clips. Sew a 3/8" seam along both "open" ends. Trim and clip corners.
6. Turn WSO and complete a FRENCH SEAM. This sound fancy, but basically, sew a seam on the wrong side encasing the last seam.
 |
| Sew RST Along the Two Long Top Edges |
 |
| Turn RSO and Press Seams |
 |
| Sew Along Top Edges to Finish |
 |
| Fold Clutch in Half, RSO, Matching the Top Edges and Secure With Binder Clips, Then Sew Each Side |
 |
| Trim Each Side and Clip Corners |
 |
| Turn WSO, Encase Seam in a FRENCH SEAM by Sewing Along Each Side Again, This Time On the Wrong Side (Lining Side) |
Part 3: Boxing the Bottom
7. Turn RSO and "box the bottom by taking the corner and sewing a diagonal seam(I use a marking pen to draw the seam on the fabric on which I will sew) from side to side 1 1/2" long. Trim seam to 1/4"*In the pictures below, I am using a different main fabric...Sorry for the differences..
9. Turn RSO-bag sewn and complete.
 |
| Box Each Corner Bottom by Sewing a 1 1/2 " Seam Diagonally |
Part 4: Attach Frame
10. Measure length of clutch to help center frame onto the clutch. Mark 2 lines on either side where you should glue the frame. My clutch ended up 11.5" long, hence I placed my frame in 2.5" on either side. (11.5-6.5/2=2.5)
11. Put a thin bead of glue inside the open channel of one side of the frame. Slip the clutch edge into the channel, working carefully, but quickly. In my opinion this is the hardest part. If you get glue on the frame, no big deal, you can rub it off, but you do not want glue on the showing part of the fabric.
12. Let the glue dry for a spell before you attempt to glue the opposite side of the frame. But, when it seems pretty secure, glue the 2nd side in the same fashion.
13. Allow the clutch to sit for 24 hours while the glue dries and sets.
14. Open frame, and fold edges inside of frame to finish.
 |
| 6.5 Open Channel Purse Frame |
 |
| Apply Thin Bead of Glue Into First Channel, Repeat For 2nd Side |


