Thursday, September 27, 2012

Put Your Stamp On It

I make things.  I make things all. of. the. time. Since I make things, I always like to put my stamp on it- like a period at the end of the sentence.  Now there are many ways to make labels, hell you can even buy them.    I tend to think that this detail should not be overlooked.  Here is what I did this past weekend to attend to this detail when I make things.


  1. Gather your supplies:  
  • You'll need fabric cut into the size your printer will accept. You can use any type fabric, but you need to think about fraying.  For this reason, I use jersey knit.  If you choose something that  frays, use some Fraycheck on the edges and that should do the trick.
  • Container that will fit your fabric.  I use paint trays.
  • Freezer paper
  • Scissors/rotary cutter
  • Bubble Jet Set(can be found many places-just do a google search).  This is an additional step needed to prepare your fabric so that you can wash the  labels.  If you don't wash your handmade goods, then you can print directly to the untreated fabric.  I make a lot of clothing, so I need to treat my fabric.  If you are going to treat your fabric, follow the instructions on the Bubble Jet Set, which basically entails soaking your fabric in the solution, drying it, printing on it, and then rinsing it.  Pretty easy stuff...and pretty cool stuff that Bubble Jet Set is...


2.  Design your label using any software.  I used Photoshop.  I made each label to approximate 2 inches, and put my name centered about an inch down.  So that when I cut the labels, I make a hang tag type.  In this case, you fold each label in half and lay it in you seam and sew it up.  Or you can make any type of label you might want.  Your limit is only your creativity.


3.  Now for the best invention that is hardly ever used for what it is intended:FREEZER PAPER.  I love this stuff.  Anyhow, cut pieces a wee bit bigger than your fabric sheets and iron it on each fabric sheet.  This gives your fabric structure that can run through your printer.  Then after each sheet is prepared, print your layout on the fabric paper...hard work is done.


Here are my freshly printed label sheets:


4.  Cut out the labels using scissors or an rotary cutter.


And there you go....labels: painless, cheap, and handmade...


The devil is in the details,,,,

Tuesday, September 18, 2012

Whittle While You Play

While I was away on holiday, I worked on yet another craft show project...My guest room pillow cases...Check it out...


Monarch of the Seas

I went on my first-ever vacation away from the kids and Pete...A 5 day cruise to the Bahamas with my dear friend, Vanessa.  The funny thing about this cruise is that I did this exact cruise back in the late 90's...It was then my first ever cruise.  Pete earned the title "Employee of the Year"and they sent us and several other employees of the year on this cruise. I had a good time then, and I had a good time now...Here is a toy camera collage:

Drink of the Day:  Bahama Mama

Vanessa drinking the Drink of the Day

Dinner Glamour Shot

Nothing Much to Add

We had a lot of these...

Walk Like An Egyptian

Loved the Sign at the Entrance of the Handmade Straw Market

Monarch of the Seas

Vanessa's Cake Decorating Win

The Last Drink...right before I lost my toenail.

After I lost my toenail

Washi Pattern


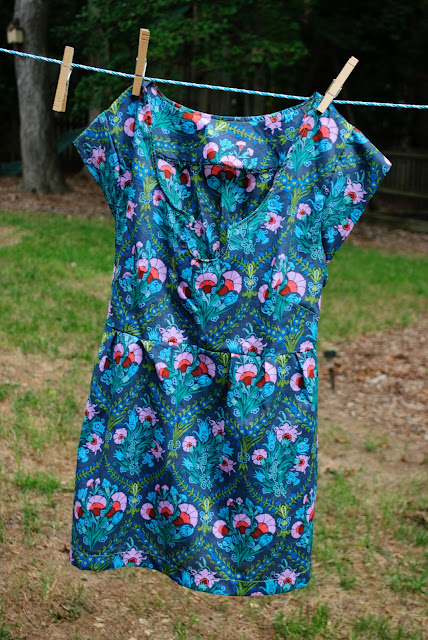
While I usually do not follow patterns, I  bought an adorable pattern over at Made By Rae...I love it especially for the easy adaptability.  From one pattern you can make the dress seen here, as well as a maxi dress, or a tunic.  I loved it "sew" much I quickly made the dress (from the namesake fabric, Washi) and 2 tunics...Great fit and easy construction...2 thumbs up!  I'm getting ready to start on another....

Monday, September 03, 2012

What Is Red, Blue, and White All Over?

 ...Kate's 4th of July dress.  I completed this little number with the 4th of July in mind.  I wanted a simple, easy cotton dress to which end, I blended several patterns together.  A simple bodice, an empire waist, crochet trim, and a boisterous button to complete the look...


READ

My new craft fair project for this year...library read bags-equipped with a library card pocket.  I'll be selling these over on Etsy...


1st Day of School 2012

Kate's first day of second grade, see how frustrated she is by the picture.


And,

Henry's first day, ever, of preschool...Quite a different reaction...